Monday, April 30, 2012

Friendship Plaque from GlueArts


"The most I can do for my friend is simply to be his friend. I have no wealth to bestow on him. If he knows that I am happy in loving him, he will want no other reward. Is not friendship divine in this?"

 - Henry David Thoreau

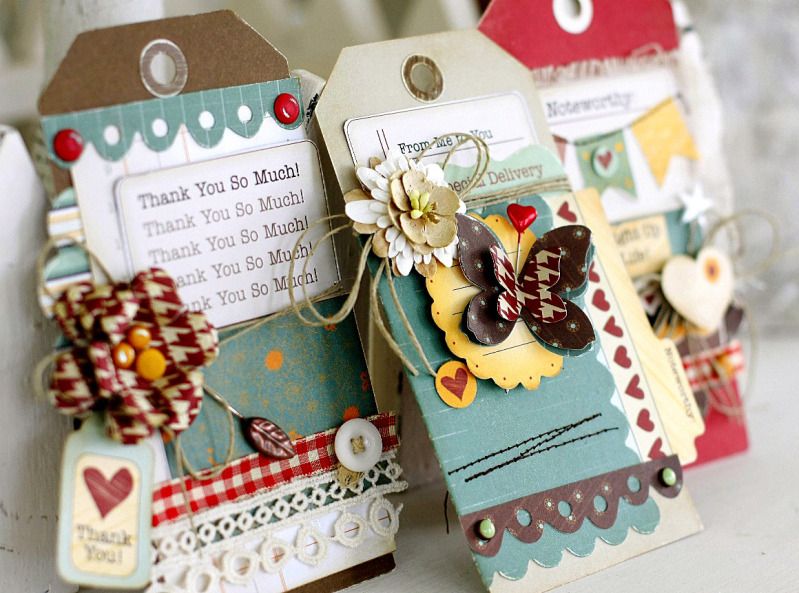
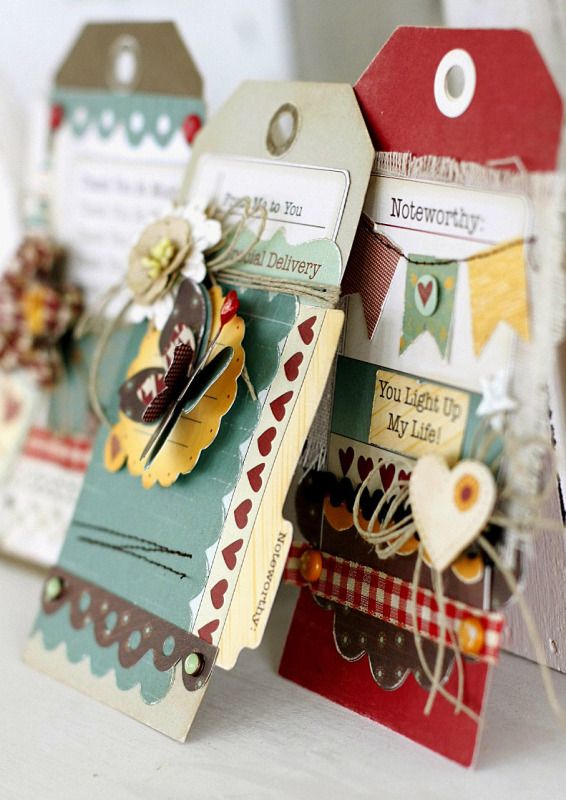
This along with the beautiful quote on Audrey's Pettit both serve as reminders of how fortunate we are to have a friend in the world!

We count all of you...yes YOU are GlueArts fans are our friends and for that today...we're thankful!

And thankful to talented Designers such as Audrey Pettit for sharing this beauty with us!!

user posted image

user posted image

user posted image

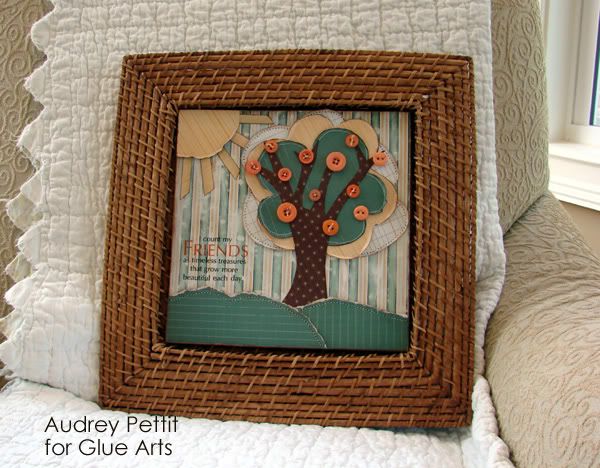
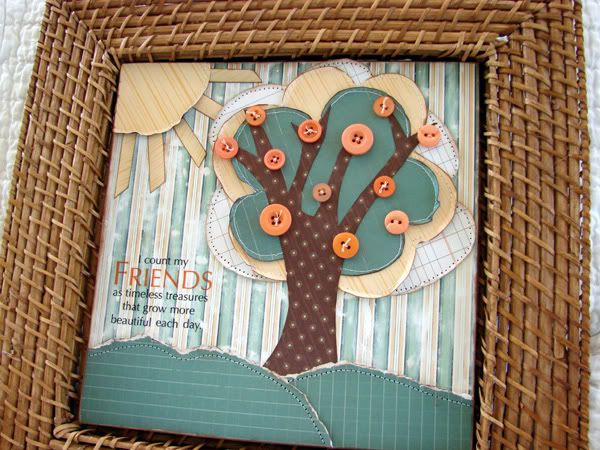
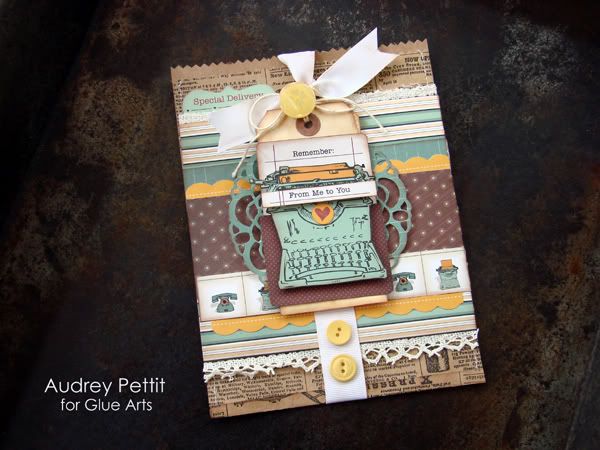
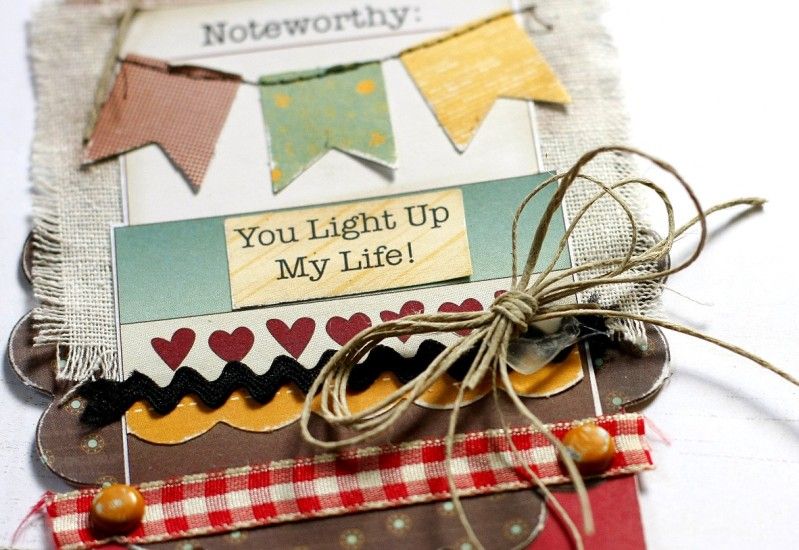
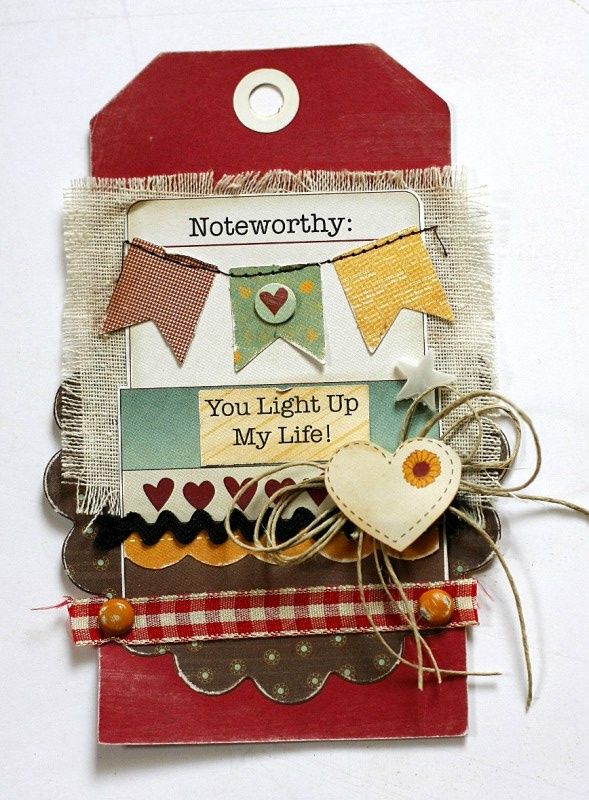
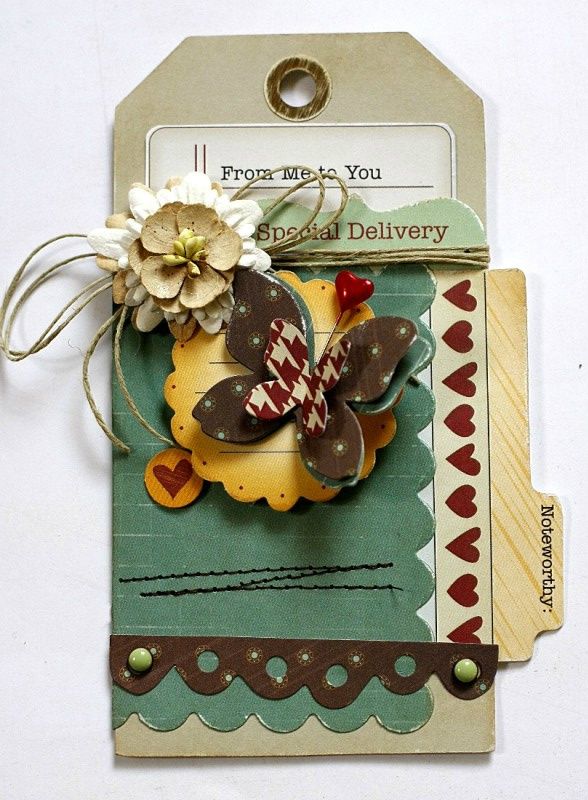
Friends Plaque by Audrey Pettit
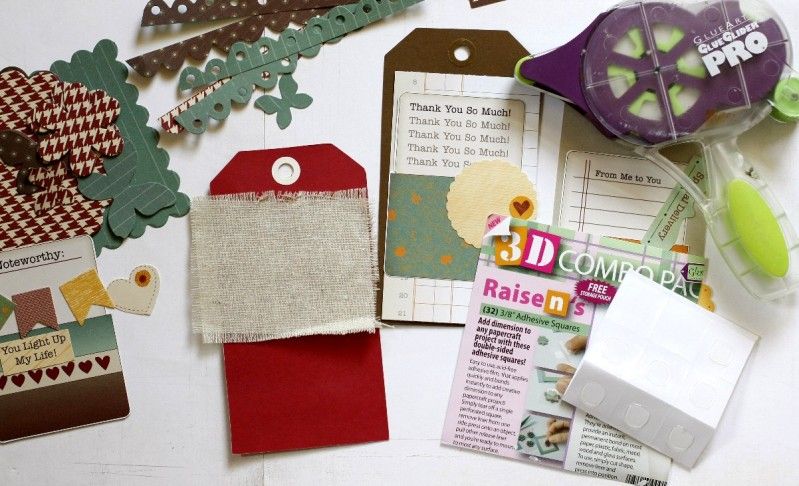


Supplies:


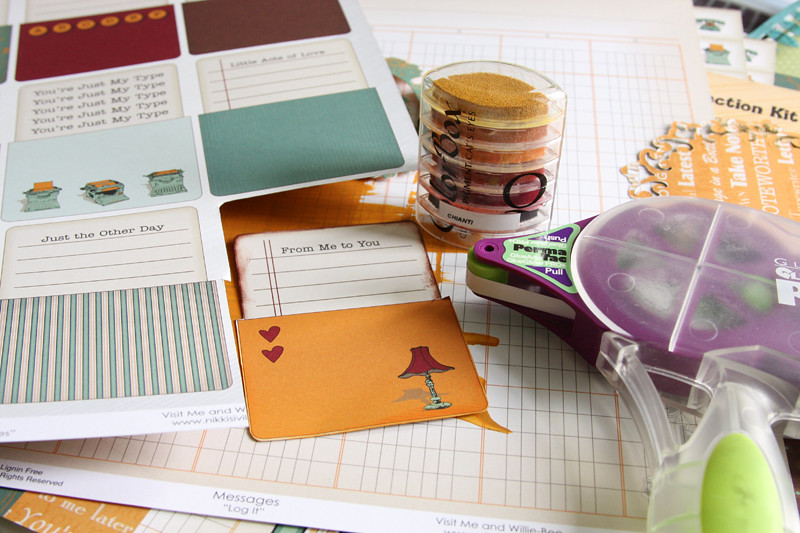
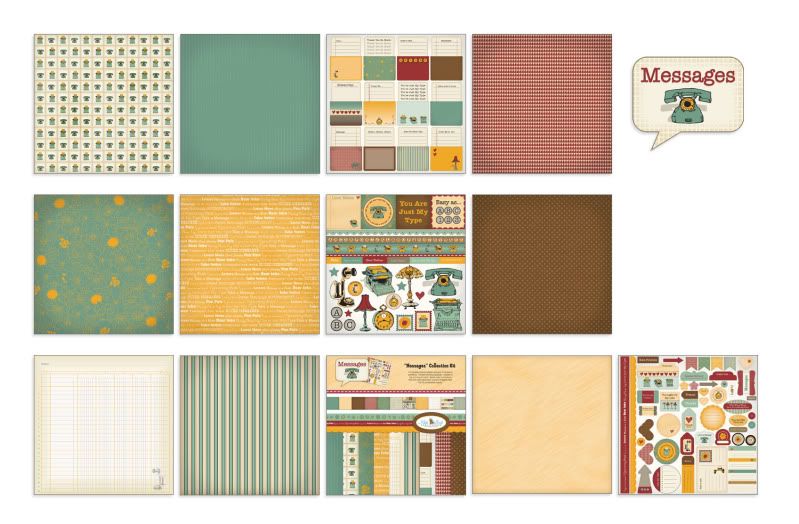
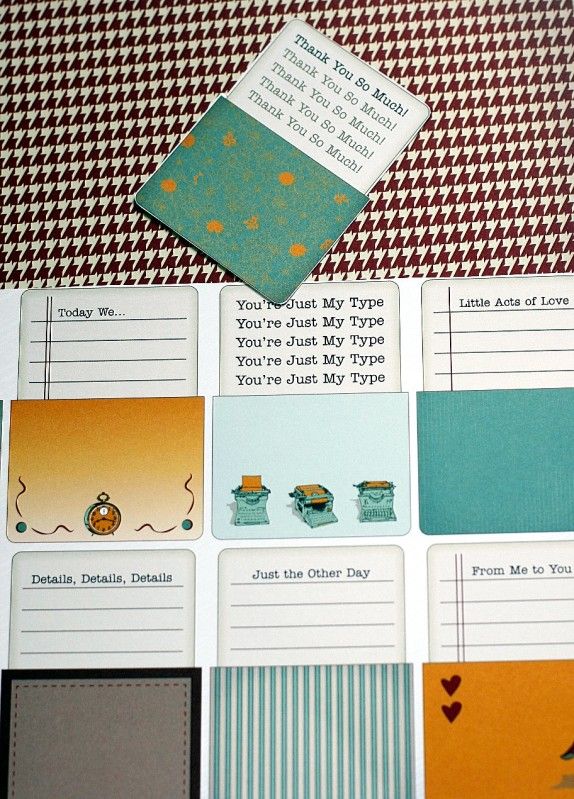
Nikki Sivils Scrapbooker Messages Collection
Rub-On: It Takes Two
Buttons: Foofala
Paint: Delta
Ink: Clearsnap
Recycled Chipboard
Sanding Block

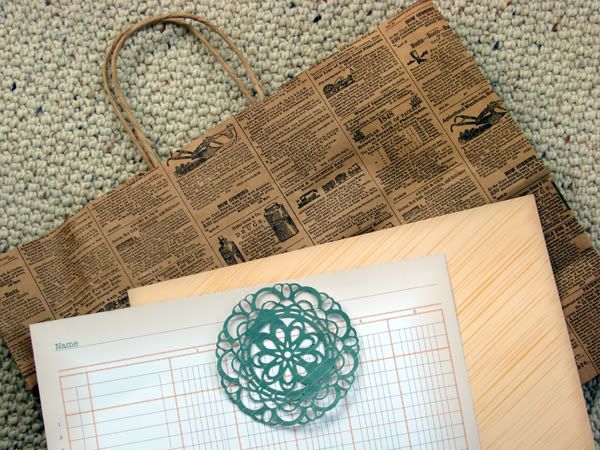
Recently on a junk hunt, I found this rattan trivet that I thought would make a fun frame. I just measured the opening and cut a piece of raw chipboard to fit the opening. The chipboard sits in there without need of any further adhesive. I love the idea that I can change the image out easily with the seasons.


user posted image

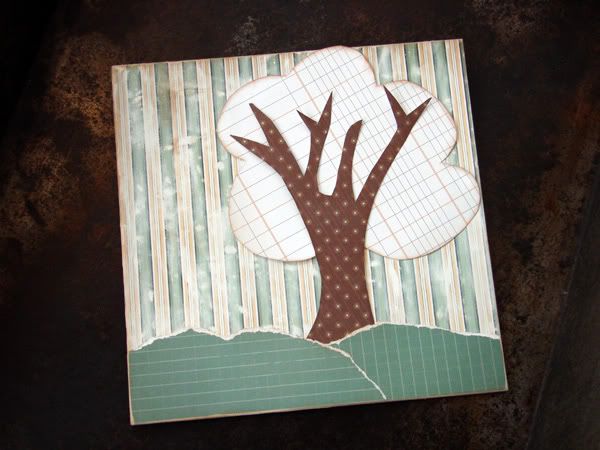
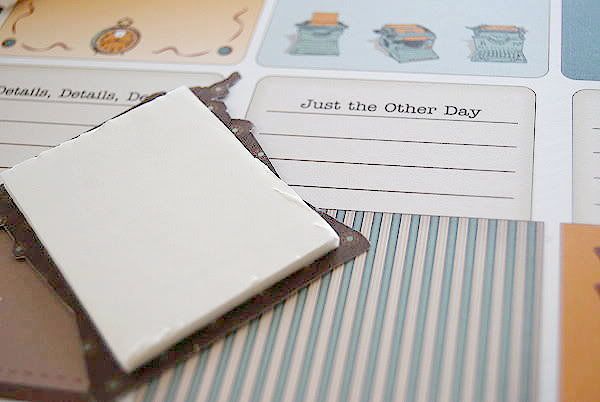
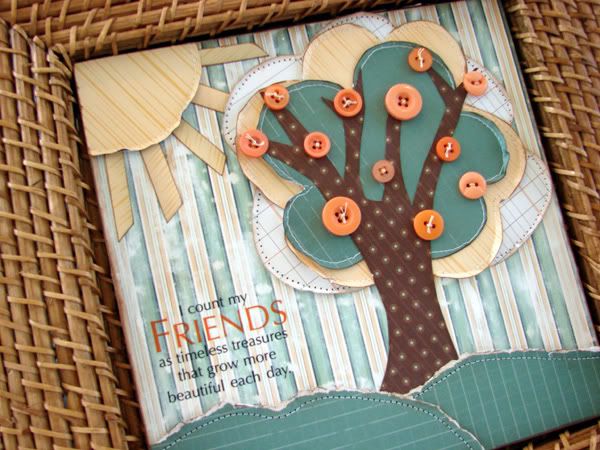
1. Cut a piece of raw chipboard to size. Cover with patterned paper using Glue Arts High Tac Adhesive. Sand the paper lightly all over to create a vintage look. Give the entire board a light wash with white acrylic paint.

*Note: Edge all paper pieces with brown ink.

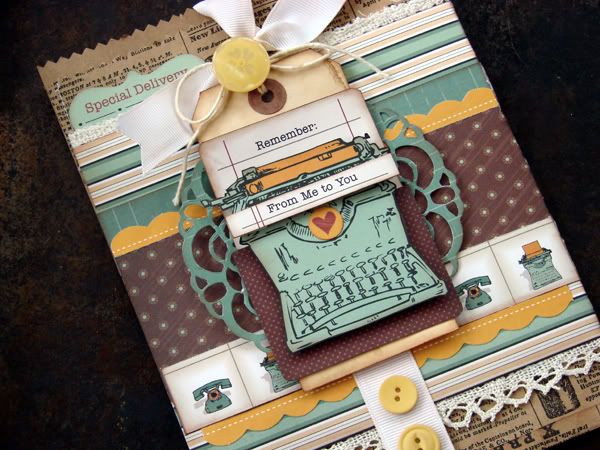
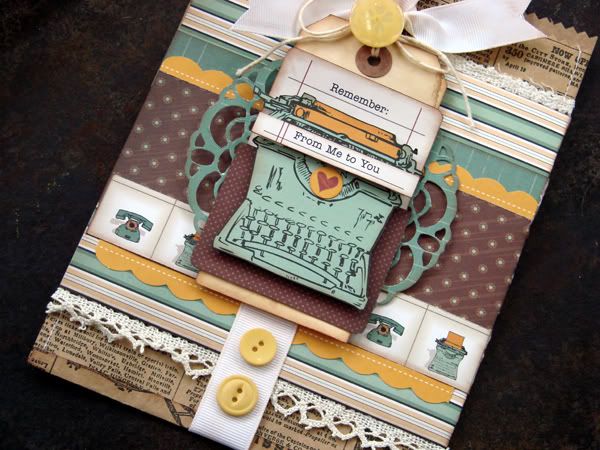
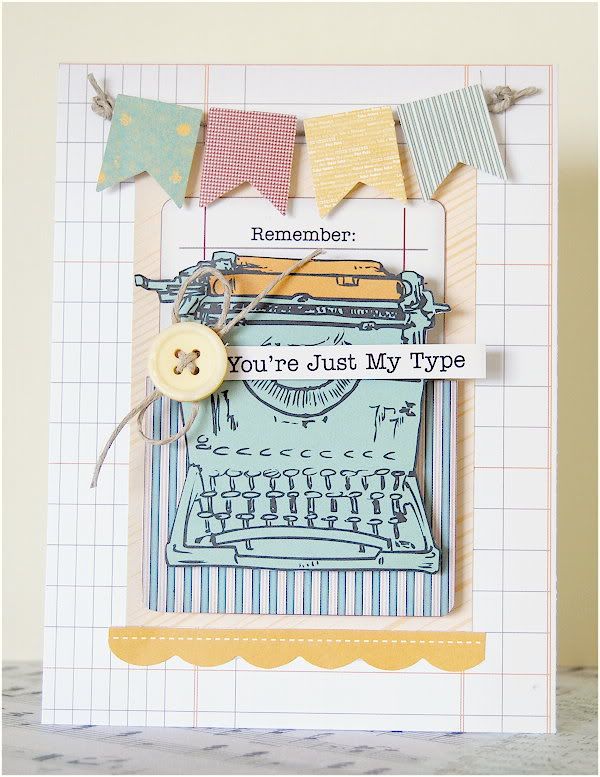
2. Freehand cut a tree trunk from brown patterned paper. Cut a tree topper in the shape of a puffy cloud form from contrasting patterned paper. Tear two pieces of green paper to create small hills at the bottom of the plaque. Adhere pieces with High Tac Adhesive.


3. Machine stitch along the edge of the grassy hills and around the tree top.


user posted image

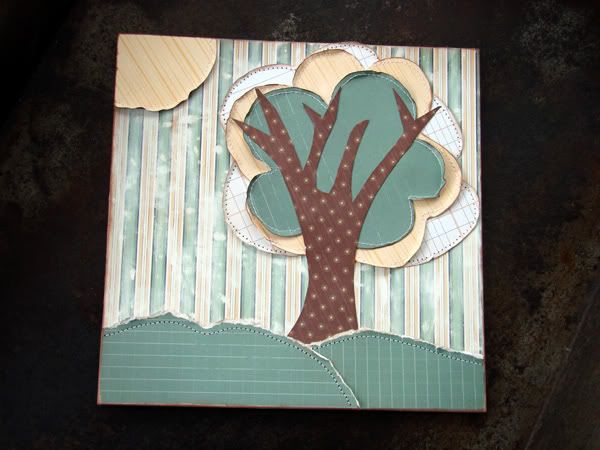
4. Cut two more puffy cloud shapes from two different patterned papers and machine stitch the edges. Adhere to the tree top.


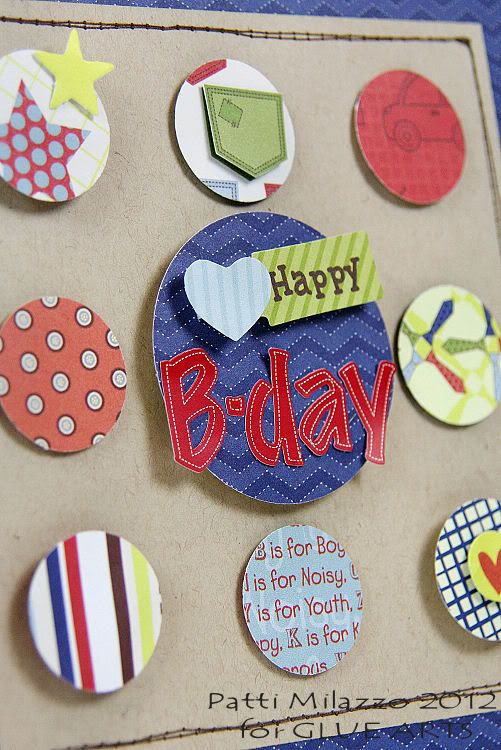
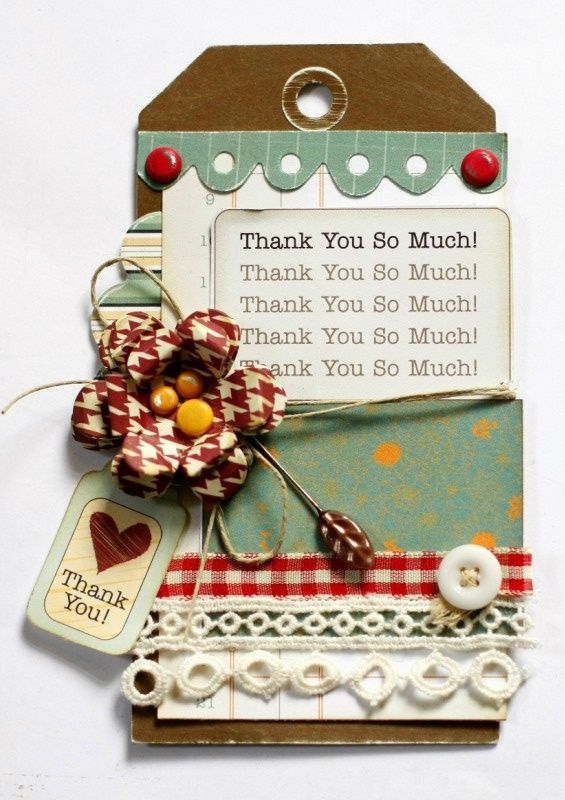
5. Cut a circle and small paper strips from yellow patterned paper. Machine stitch around the circle and adhere to the upper left corner. Cut off the overlapping edges. Adhere the paper strips in rays around the sun.


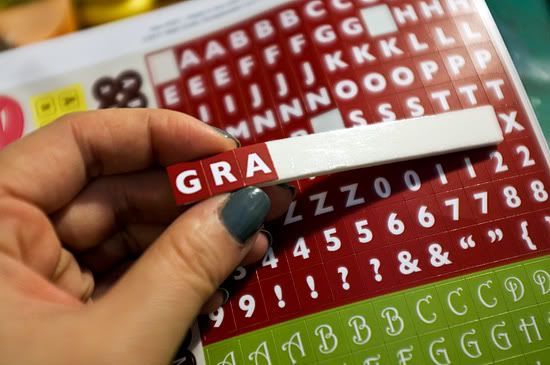
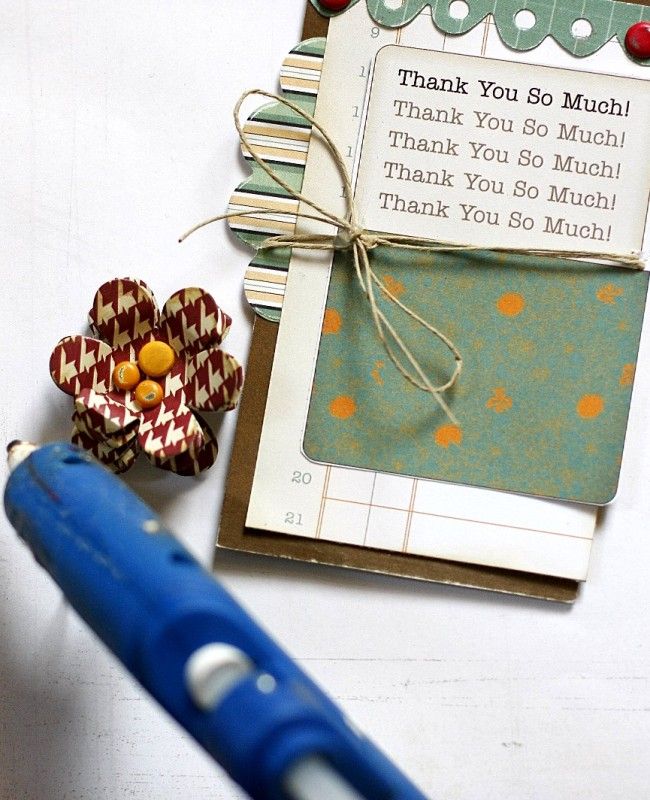
6. Apply a rub on sentiment.

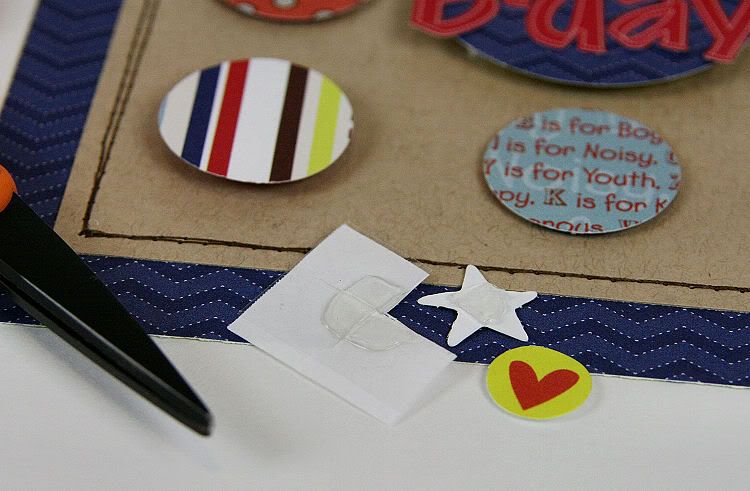
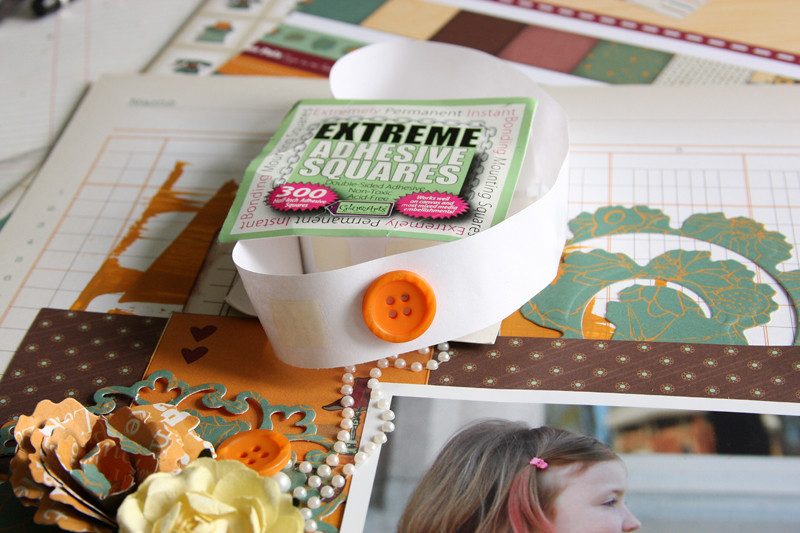
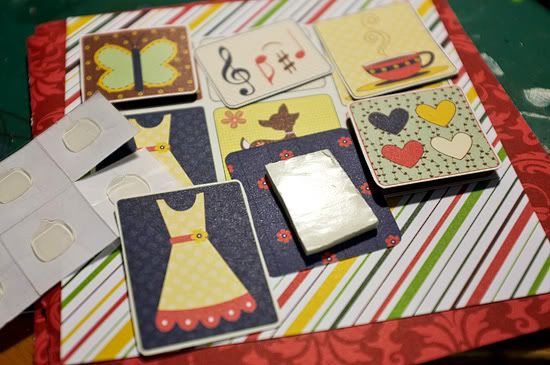
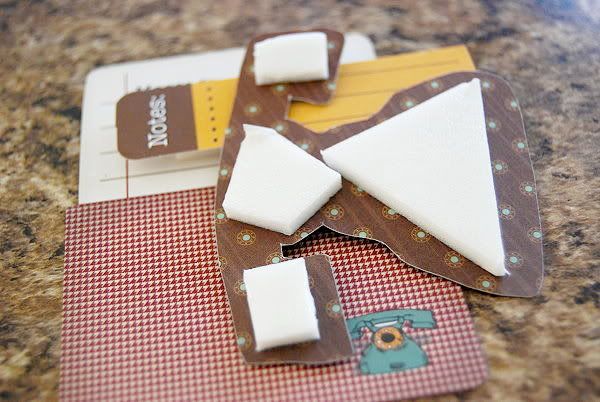
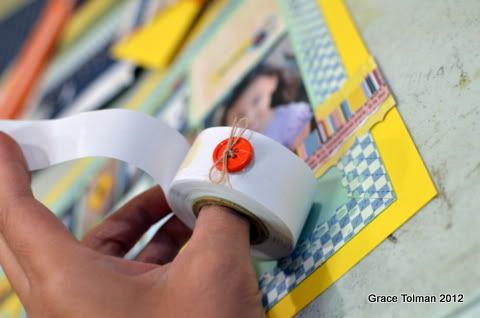
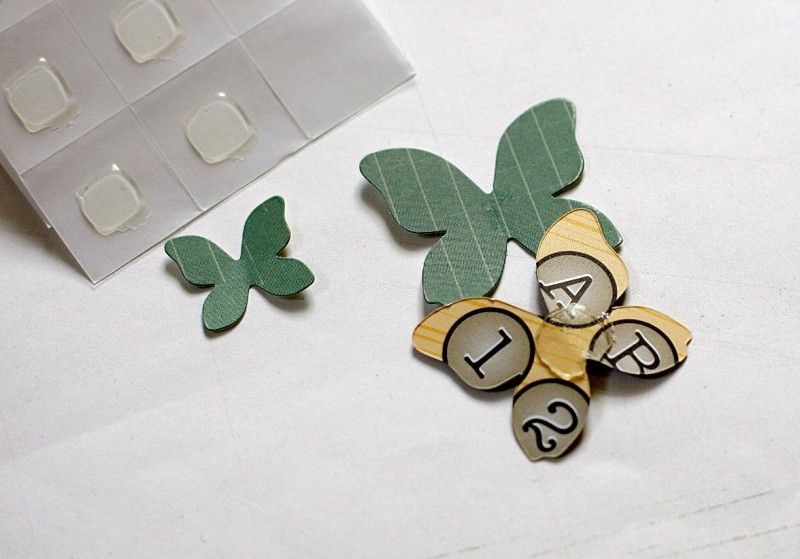
7. Add buttons to the tree branches using Glue Arts Extreme Adhesive Squares.


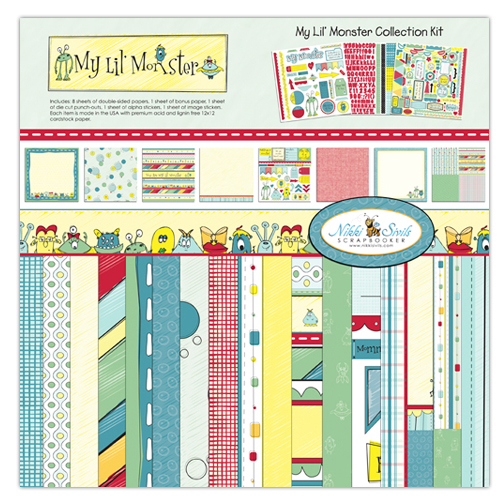
A special thanks to everyone who stopped by from Nikki Sivils last week! Let's announce the lucky winner of the Lil Monster Kit and GlueArts Adhesives...


 Michelle said...


what a nice way to start my day...with a visit to your blog...and a fast mojo jump start!...i love nikki sivlis paper lines...the colors are always terrific an the prints are just my style!...
add a little glue arts adhesive...and you're ready...set...go...and on your way to being creative!
April 24, 2012 9:11 AM
Congrats to you Michelle! Please email me at Gluegirl@gluearts.com with your info! And speaking of winners...we're still seeking our winner from our 8,000 fan giveaway. Today is the final day to come forward and then we must give another fan a chance to win! So "Suba" if you're out there..please send us a note as well!


Suba said...
Hi!


Part of FB's Fan Fun.
Love the way you've used the Raisens. Can think of a bunch of uses.
Thanks for the chance to win!

April 22, 2012 10:32 PM

Thanks for stopping by today!! We'll see you soon with ideas for Mother's Day and more!

Friday, April 27, 2012

From GlueArts To You...Happy Crafting!

Happy Crafting!

 Usually those words bring a smile to the face and a million ideas that run through the mind for the next craft project! We're wrapping up this week with Nikki Sivils and her team and sending out good vibes to everyone for some happy crafting. And when you craft...be sure to chose GlueArts Adhesives so you too can make what Designer Audrey Pettit and Patti Milazzo share with us today!

user posted image

user posted image

user posted image

From Me to You Gift Bag 
GlueArts Designer: Audrey Pettit


Supplies:

Nikki Sivils Messages Collection:
Patterned Papers and Die Cut Sheet
Tag: The Kraft Outlet
Doily Die: Sizzix
Trim: Craft Supply
Buttons: Foofala
Ink: Clearsnap
Recycled Kraft Printed Shopping Bag
Pinking Scissors

Recently, while out shopping, I received a very fun kraft shopping bag with a vintage-ad print, which was way too cool to throw away. Although the bag was a bit too big for an average gift bag, I've saved it and cut it apart to create all new bags, like the one here. It's super easy to make your own bags, and it's earth-friendly and budget-friendly, too.

Instructions:

1. To get started, cut open the kraft shopping bag. Then cut two rectangles from the paper in the desired size of your finished new bag. Cut both pieces to the same width, but allow an extra 1/2" in height on the second piece. For my bag, I cut my two pieces at 6" x 8" and 6" x 8.5".


user posted image

2. Cut the tops of both pieces of printed kraft paper with pinking scissors. Lay the wrong sides of the paper together and then machine stitch down both sides. Fold up the bottom 1/4" of paper, edge with brown ink, and adhere flap using Glue Arts High Tac adhesive.


3. Cut various strips of 12" patterned paper in different widths. Adhere strips together. Add die cut scalloped border. Adhere lace trim to the top and bottom edge using Glue Arts Ribbon Adhesive.

4. Fold finished strip in half and adhere to the center of the bag using High Tac adhesive.

5. Tie inked ribbon around the center of the gift bag.


user posted image

6. Fussy cut a journaling card from patterned paper and adhere to the center of a shipping tag. Die cut a doily from patterned paper and adhere behind the tag. Fussy cut a typewriter from the patterned paper and adhere to the tag with U Cut It Foam adhesive.


7. Embellish with a sentiment strip cut from the paper, Messages die cuts, and matching yellow buttons.


user posted image
Happy Bday Card
GlueArts Designer: Patti Milazzo

Supply List: 
Glue Arts- 
Glue Glider Pro 1/4 Perma Tac Cartridge Refill - Pro
U-Cut-It Adhesive FoamRaise ‘Ns

Nikki Sivils: Noah Collection Kit


Instructions:
Create a 6" square card from kraft and set aside.

Cut a 6" square of blue pattern paper. Also cut a 5" square of kraft cardstock and adhere it to the front of the blue paper using the Glue Glider Pro with Perma Tac Adhesive. Machine stitch around the border of the kraft square twice.

Punch 9 circles from a mix of patterned paper. I used 1" circles around the outside and a 2.5" circle in the center. 


user posted image

Cut pieces of U-Cut-It Foam Adhesive to fit behind the center circle and a few of the smaller circles as well. Apply Raise 'Ns to the remaining circles for just a bit of dimension.

user posted image

Apply letter stickers for the sentiment on the center circle. Use more U-Cut-It Adhesive Foam to add the "Happy" tag and heart die-cut.

user posted image

Add additional tiny die-cuts to the circles by cutting the Raise 'Ns - leave the paper and clear plastic backing on to cut the Raise 'N into 4 small pieces.

Use the Glue Glider Pro again to adhere the embellished card front to the 6" kraft card to complete.


user posted image


We hope you've enjoyed our week with Nikki Sivlis!!


We're giving away this fun My Lil' Monster Kit from Nikki Sivlis...perfect for Father's Day, cute kids, grandkids...you name it...we're sure you'll find just the right things to use it for! 

Simply post a comment and we'll enter you to win this fun collection kit filled with paper, stickers and much more! And to help you with your crafting, we're going to include our Glue Glider PRO Handle (already own one...no problem we'll offer you a second cartridge!) and our PRO+ Perma Tac Cartridge plus we'll tuck in our must have 3D Combo Pac. It's filled with our GlueArts U Cut It Foam (used here today!) along with our Raisen's! Now that's a giveaway!

We'll collect all the comments and pick one random winner next Monday! Please remember to visit the Nikki Sivlis Blog and her talented Doghouse Diva's to see what they've created this week with GlueArts products! Be sure to visit the Nikki Sivils page on Facebook and give them a like!! Let them know GlueArts sent you by! If you would!  

We'd also like to extend a sincere thank you to Nikki and her team for working with us!!

Thursday, April 26, 2012

Layer It On With GlueArts

Hello Hello!
Happy Thursday to you!
Today we bringing you not just ideas from the GlueArts blog but the Designers at Nikki Sivils have joined in too! It's one inspiring day!

Up first...Designer Lesley Langon has a unique layout...a little paint, some papers and adhesives and you have a masterpiece that could be hung on your wall! And Ania Lexander says congrats and more then one language with her fun cards! GlueArts U Cut It Foam give her cards just the right left to make them stand apart from all the others!

user posted image
I Love You Layout
GlueArts Designer: Lesley Langdon

Supplies:
GlueArts Extreme Adhesive Squares

GlueArts Glue Glider Pro+ (Perma Tac Adhesive)

Nikki Sivils Patterned Paper and Die Cuts (Messages)
Spellbinders S5-035 Parisian Motifs
Spellbinders S4-351 Spiral Blossom One
Clearsnap Inc. ColorBox Queue (Wood Grain)
Making Memories Acrylic Paint (Acorn)
Want2Scrap Pearls
Pebbles Inc. Resin Flower Brad
Prima Marketing Inc. (flower)

Instructions:
1. Paint Nikki Sivils patterned paper, using something like a credit card to swipe it across the page. Let dry.

user posted image

2. Die cut several Spellbinders shapes and flowers from the patterned papers to use as embellishments.
3. Cut a strip of brown patterned paper and cut a banner from one side.
4. Hand cut, ink edges of patterned paper elements (such as the library card) and adhere all paper elements with GlueArts Glue Glider Pro+ (Perma Tac Adhesive).

user posted image
 
5. Adhere buttons and flowers with GlueArts Extreme Adhesive Squares.

user posted image 
6. Hand draw a string in the top left corner and adhere Nikki Sivils die cut paper banners to it.
7. Add journaling, brad and pearls.

user posted image
user posted image

user posted image
Quick and cute cards
GlueArts Designer: Ania Lexander

The Audrey collection makes quick and very cute cards for little girls methinks!
In the collection pack you'll have everything you need to whip up these two cards in no time... 

GlueArts Supplies:
Raisen's
U Cut It Foam
Extreme Adhesive Squares - large
Glue Glider PRO+ - perma tac

Nikki Sivils: Audrey collection pack


user posted image
I can't resist sheets like this: Easy to cut out and easy to use as blocks for your card. For the first card I chose a cluster of blocks for my base, then found the same patterns on the sheet of paper and cut them out one by one. Mixing between GlueArts Raisen's and U Cut It Foam it gave the card variations on the dimension.

user posted image
Usually I'd use the glue glider to adhere this block to the card, but because the dimensional front was already in place I opted for the extreme adhesive squares instead.

user posted image
Finally - block letters allows this technique to be used - cut a long strip of U cut it foam, attach the letters to it then apply the whole title to the card.

Can you tell the gals have enjoyed working with Nikki Sivils product collections??!

We'd love for you to have a chance to work with the products too!


Simply post a comment and we'll enter you to win this fun collection kit filled with paper, stickers and much more! And to help you with your crafting, we're going to include our Glue Glider PRO Handle (already own one...no problem we'll offer you a second cartridge!) and our PRO+ Perma Tac Cartridge plus we'll tuck in our must have 3D Combo Pac. It's filled with our GlueArts U Cut It Foam (used here today!) along with our Raisen's! Now that's a giveaway!


We'll collect all the comments and pick one random winner next Monday! Please remember to visit the Nikki Sivlis Blog and her talented Doghouse Diva's to see what they've created this week with GlueArts products!   

Wednesday, April 25, 2012

Hello We're Going to "Alter" Your Energy At GlueArts


user posted image
user posted image
Hello Card Set
GlueArts Designer: Andrea Budjack


Glue Arts Supplies:
Perma Tac
U-Cut It Foam
Extreme Adhesive Squares


Additional Supplies:
Nikki Sivils - die cut tags, paper
Giant Dwarf - felt
Papertrey Ink - cardstock, ink, die
Fiskars - circle stamp
KaiserCraft - adhesive pearls
Quickutz - circle die
fabric
glass pearl bead

Instructions:
1. Cut cardstock and fold.

2. Cut Nikki Sivils paper to cover front of card (woodgrain). Cut pink Nikki Sivils strip of paper. Layer and adhere to card front using Glue Arts Perma Tac. Add fabric ribbon to card.


user posted image

3. Die cut felt rectangle. Cut Nikki Sivils paper to stitch onto felt. Back with Glue Arts U-Cut It Foam and adhere to card front.

4. Die cut label, die cut center of label using circle die and stamp. Back with U-Cut It Foam and adhere to card.

5. Die cut circle from pink Nikki Sivils paper and cut into spiral. Create flower. Adhere to front of card using U-Cut It Foam and Extreme Adhesive Squares. 

6. Cut tag, stamp and adhere to front of card.

7. Add adhesive pearls.

8. Trim Nikki Sivils die cut labels and adhere to top left corner of card using Perma Tac.


user posted image


user posted image

user posted image

user posted image
Altered Energy Drink Can
GlueArts Designer: Jan Hennings

Supplies:
Glue Glider Pro and Perma Tac, Hot Glue Gun and Glue Sticks (Glue Arts)
"Messages" Paper Line (Nikki Sivils)
Vintage typewriter, wire
Clear Versa Mark Ink Pad (Tsukineko)
Green and Copper Embossing Powder (WOW!)
Gesso (Golden), Spigot Knob (Hobby Lobby), Twine (Really Reasonable Ribbon)


So let's hear it....how do you like giveaways? And how about winning this cute brand new kit from Designer Nikki Sivlis? And and and....wait...what about if we include some GlueArts Adhesives in this giveaway!

Simply post a comment and we'll enter you to win this fun collection kit filled with paper, stickers and much more! And to help you with your crafting, we're going to include our Glue Glider PRO Handle (already own one...no problem we'll offer you a second cartridge!) and our PRO+ Perma Tac Cartridge plus we'll tuck in our must have 3D Combo Pac. It's filled with our GlueArts U Cut It Foam (used here today!) along with our Raisen's! Now that's a giveaway!

We'll collect all the comments and pick one random winner next Monday! Please remember to visit the Nikki Sivlis Blog and her talented Doghouse Diva's to see what they've created this week with GlueArts products!   


Tuesday, April 24, 2012

GlueArts Has a Message for You!


user posted image  


You're just our type!!!

And so are the gang at Nikki Sivlis!!

We're back today with two new projects from Designers Jaime Warren and Kristen Swain featuring Nikki Sivlis products and GlueArts Adhesives! What more could you want!!!


user posted image

Set of "Messages" Cards
GlueArts Designer- Kristen Swain


user posted image
Supplies:


Nikki Sivilis Messages Collection
twine/buttons


user posted image

1. Use UCutIt foam to pop up cut outs from the paper collection.

user posted image

2. Cut blocks of paper and adhere to card base with Perma Tac. Then cut out images from paper and adhere with more UCutIt foam.

user posted image

3. Decorate cards as shown with UCutIt foam, use buttons and twine to finish.

user posted image


"An Adventure Together" Layout
GlueArts Designer:  Jaime Warren

Hi everyone!  Jaime Warren here with you today to share a layout I created using some fabulous Nikki Silvis & Glue Arts products!  

Supplies:
 
For this layout I pulled out my trusty and well loved stencil set and put the circle stencils to work!  I loved all of the different patterned papers and I wanted to be able to incorporate several of them on my layout.  The circles were the perfect way to do just that!  I started by creating a slightly off center design with my circles and then placed my photos in the middle of those.  I started attaching the smaller circles using both the Glue Glider Pro and U Cut It Foam.


I then cut several circles in half and attached them with U Cut It Foam to the sides of the layout.  I placed my title over my photos, in the center of my main design.  I loved all of the die cut pieces so I incorporated those by trimming them down and attaching to the sides of my layout.
 
After a few splashes of mist, I used my scallop punch to punch out my border and attached using my Glue Glider Pro. 


The final result:


I hope you enjoyed my project today!  Thanks for stopping by the Glue Arts blog!!


So let's hear it....how do you like giveaways? And how about winning this cute brand new kit from Designer Nikki Sivlis? And and and....wait...what about if we include some GlueArts Adhesives in this giveaway!

Simply post a comment and we'll enter you to win this fun collection kit filled with paper, stickers and much more! And to help you with your crafting, we're going to include our Glue Glider PRO Handle (already own one...no problem we'll offer you a second cartridge!) and our PRO+ Perma Tac Cartridge plus we'll tuck in our must have 3D Combo Pac. It's filled with our GlueArts U Cut It Foam (used here today!) along with our Raisen's! Now that's a giveaway!

We'll collect all the comments and pick one random winner next Monday! Please remember to visit the Nikki Sivlis Blog and her talented Doghouse Diva's to see what they've created this week with GlueArts products!   

Monday, April 23, 2012

Welcome to Nikki Silvis Week

Guess what?!

We're kicking off a brand new week of ideas and inspiration and a BRAND NEW partner!


We're so excited that we've teamed up with Nikki Silvis and her talented team of designers all this week!

That means ideas, layouts, cards, and more and yes...chances to win both here on the GlueArts blog and on the Nikki Silvis blog too!

We're kicking off this week with a cute layout from Designer Grace Tolman using the brand new
Exit Here Collection! Designer Linda Albrecht has an amazing assortment of beautiful tags with all sorts of goodies on them! Both Designers chose our Glue Glider PRO+ to help keep everything in place!


user posted image
Road Trip Layout
GlueArts Designer: Grace Tolman 

user posted image

user posted image

Supplies Used:

Glue Arts Perma Tac
Glue Arts U cut it foam
Glue Arts Mini Square
Glue Arts Raisen’s
Glue Arts Extreme Square
Cardstock- WorldWin
Pattern papers, stickers and die cuts- Exit here, Nikki Sivils
Buttons- Favorite Findings
Twine- Source Unknown
Border punches- Fiskars, Recollections
Typewriter- Royal

I used the Exit Here collection to produce this two page layout about a part of a family road trip vacation two years ago. As a scrapbooker, I took almost 300 photos of our two week trek but decided to split them up into a few pages so I don’t feel overwhelmed in trying to fill a single scrapbook page with tons and tons of photos. With the help of a themed collection like this from Nikki Sivils and Glue Arts adhesive, making this project was easy as pie.


user posted image

user posted image

user posted image

user posted image


user posted image
Gift Tags

GlueArts Designer: Linda Albrecht

Supplies:
Glue Arts Glue Glider Pro+ with Perma Tac Adhesive
Glue Arts Raisen's & U-Cut-It Foam
Glue Arts Hot Melt Glue Gun with sticks
Nikki Sivils "Messages" Collection Kit
Buttons and brads- BasicGrey
Trinket Pins- Maya Road
Dies- AccuCut & Ranger
Flowers- Prima
Jute twine and miscellaneous trims & fabric

Instructions:


1. Cut sentiments from patterned paper then use other patterned papers for die cutting shapes for 

3 large tags.
user posted image

user posted image
2. Layer papers and die cuts onto red tag with Perma Tac Adhesive, machine sew along tops of paper flag die cuts and add a Raisen dimensional adhesive square to the backside of heart die cut from collection kit.
user posted image
3. Cut 3 pieces of jute twine and tie all into a bow. Apply a Raisen dimensional adhesive square to the tag and place the jute bow on top of it.
user posted image
4. Add the heart with Raisen onto the top of the jute bow and add a star trinket pin.
user posted image
5. Layer largest butterfly diecuts together with a Raisen.
user posted image
6. Apply papers and die cuts onto the tan colored tag. Wrap jute twine around the tag a couple of times then tie into a bow on left side. Apply u-Cut- It Foam to a die cut label from the kit and place below the jute bow.
user posted image
7. Adhere paper flowers to the not on the jute bow. Adhere layered butterfly to label and insert red heart trinket pin for antennae.
user posted image

8. Adhere papers and die cuts to brown tag then wrap jute twine around tag and tie ends in a bow. Make a flower from patterned paper and adhere layers together with Perma Tac Adhesive then apply 3 brads to the center.
user posted image
9. Adhere paper flower to tag with hot glue and add desired trims near bottom of tag and add a button to trim end and a trinket pin behind flower.
user posted image

user posted image

user posted image
Be sure to stick around all week for chances to win!! 

And speaking of winners...we have not one but two winners to share with you today!

Our first winner of our Raisen's is:


Scrapycandy said...
I am making a shadow box full of items from our beach trip. the Raisen's would be perfect! Thanks.
April 17, 2012 5:54 PM


Our second winner of our 8,000th fan giveaway is:


Suba said...
Hi!

Part of FB's Fan Fun.
Love the way you've used the Raisens. Can think of a bunch of uses.
Thanks for the chance to win!

April 22, 2012 10:32 PM


Be sure to stop by the Nikki Silvis Blog for more ideas and ways to win all week long!!
Winners please email me at Gluegirl@gluearts.com with your information.