- Henry David Thoreau
This along with the beautiful quote on Audrey's Pettit both serve as reminders of how fortunate we are to have a friend in the world!
We count all of you...yes YOU are GlueArts fans are our friends and for that today...we're thankful!
And thankful to talented Designers such as Audrey Pettit for sharing this beauty with us!!
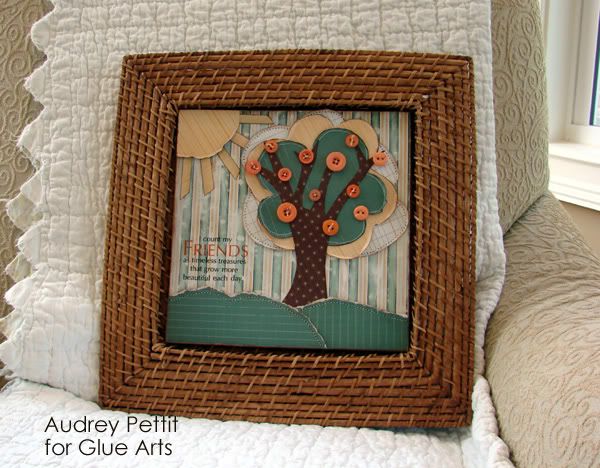
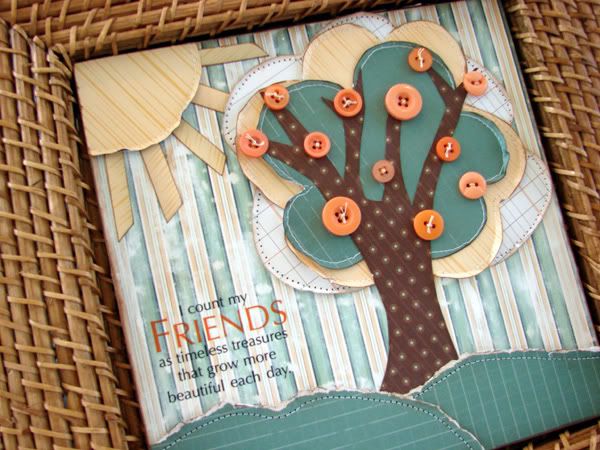
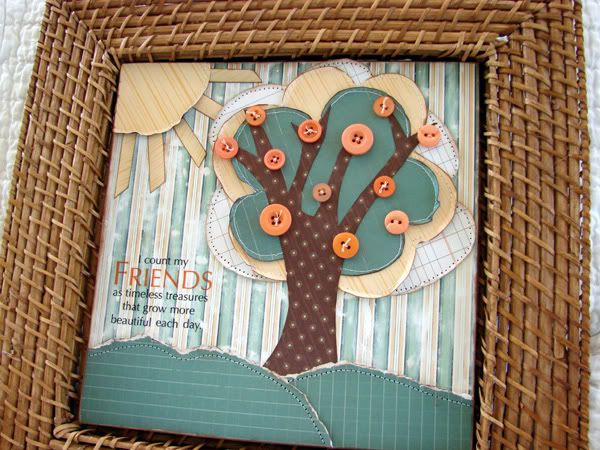
Friends Plaque by Audrey Pettit
Supplies:
Nikki Sivils Scrapbooker Messages Collection
Rub-On: It Takes Two
Buttons: Foofala
Paint: Delta
Ink: Clearsnap
Recycled Chipboard
Sanding Block
Recently on a junk hunt, I found this rattan trivet that I thought would make a fun frame. I just measured the opening and cut a piece of raw chipboard to fit the opening. The chipboard sits in there without need of any further adhesive. I love the idea that I can change the image out easily with the seasons.
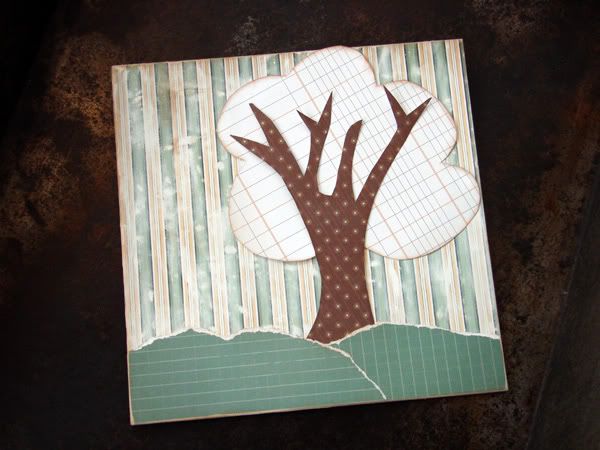
1. Cut a piece of raw chipboard to size. Cover with patterned paper using Glue Arts High Tac Adhesive. Sand the paper lightly all over to create a vintage look. Give the entire board a light wash with white acrylic paint.
*Note: Edge all paper pieces with brown ink.
2. Freehand cut a tree trunk from brown patterned paper. Cut a tree topper in the shape of a puffy cloud form from contrasting patterned paper. Tear two pieces of green paper to create small hills at the bottom of the plaque. Adhere pieces with High Tac Adhesive.
3. Machine stitch along the edge of the grassy hills and around the tree top.
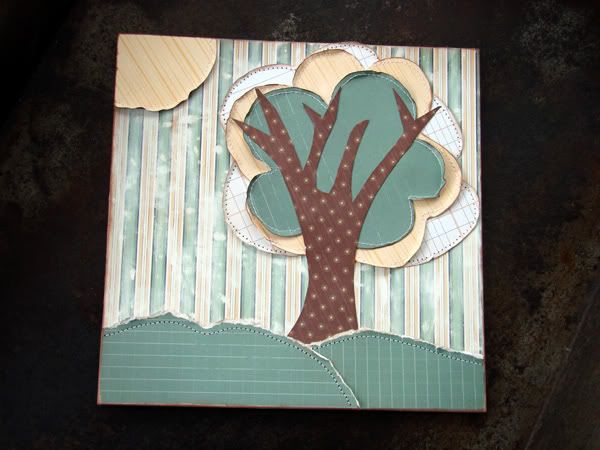
4. Cut two more puffy cloud shapes from two different patterned papers and machine stitch the edges. Adhere to the tree top.
5. Cut a circle and small paper strips from yellow patterned paper. Machine stitch around the circle and adhere to the upper left corner. Cut off the overlapping edges. Adhere the paper strips in rays around the sun.
6. Apply a rub on sentiment.
7. Add buttons to the tree branches using Glue Arts Extreme Adhesive Squares.
A special thanks to everyone who stopped by from Nikki Sivils last week! Let's announce the lucky winner of the Lil Monster Kit and GlueArts Adhesives...
Michelle said...
A special thanks to everyone who stopped by from Nikki Sivils last week! Let's announce the lucky winner of the Lil Monster Kit and GlueArts Adhesives...
Michelle said...
what a nice way to start my day...with a visit to your blog...and a fast mojo jump start!...i love nikki sivlis paper lines...the colors are always terrific an the prints are just my style!...
add a little glue arts adhesive...and you're ready...set...go...and on your way to being creative!
add a little glue arts adhesive...and you're ready...set...go...and on your way to being creative!
Hi!
Part of FB's Fan Fun.
Love the way you've used the Raisens. Can think of a bunch of uses.
Thanks for the chance to win!
Thanks for stopping by today!! We'll see you soon with ideas for Mother's Day and more!
