
GlueArts Raisen's provide the stick you need with the height you want!
Spring wreaths are just one way to spice up your home. This one is also kid-friendly and easy to make!
Designer Jan Hennings has a jazzed up picture frame...perfect gift idea for the upcoming Mother's Day and Father's Day holidays.

Raisen Up!
We're Related Frame
GlueArts Designer: Jan Hennings
Supplies:
Glue Glider Pro and Perma Tac, Raisen's (Glue Arts)
Family Outings Scrapbook Kit (Momenta), Orange Marker (Copic)

So spring is definitely here. Although we have heard some of you had snow recently??? Here's a fun way to brighten up your door, entry hall or even to hang in front of a mirror for a pretty look!
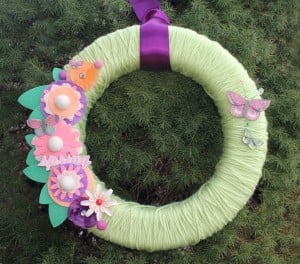

Spring is in the air, and that means time to brighten up your home with new décor. With Easter on the horizon, it's the perfect time to use all the beautiful crafts and goods you can find in your local craft store to help push those winter blahs right out the door.
One of the best ways to capture that feeling is to welcome those to your home with a spring wreath. And even better, it's kid-friendly and makes for an easy craft everyone can help with.
SUPPLIES NEEDED
• Styrofoam wreath
• Loops & Thread "Soft Fern" yarn (Michael's stores)
• Sizzix flower and leaf dies (sizzix.com)
• Pebbles in My Pocket paper flowers
• Sassafrass Lass metal flower
• Glue Arts Raisen's & Extreme Adhesive Squares (gluearts.com)
• K & Co. dimensional butterfly stickers
• Handbehg Felts wool balls (handbehgfelts.com)
• May Arts ribbon (mayarts.com)
• Wool felt, fabric, buttons
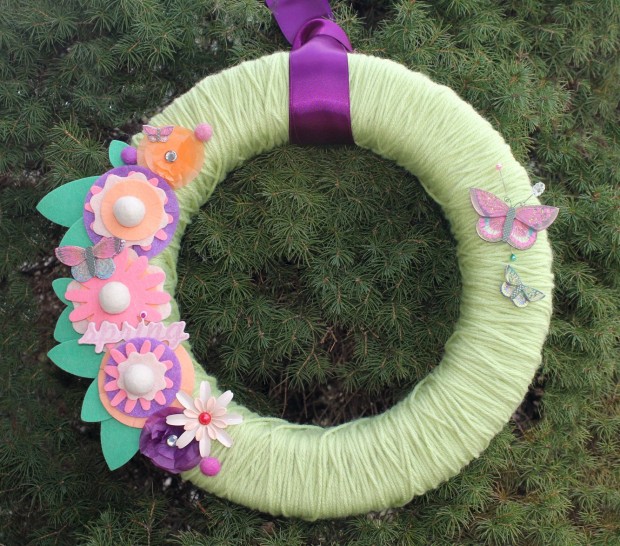
Step 1 • Wrap the wreath with yarn, covering the entire wreath. Use a straight pin or adhesive square to adhere yarn on backside of wreath.
Step 2 • Select your dies and felt colors. Handcut or diecut your flower shapes. I used sizes ranging from 3 3/4 inches to 4 3/4 inches. Kids can choose to use papers and punches instead of felt and dies.
Step 3 • Build the flowers. I used three to four flowers in various sizes. I simply layered the flowers, using GlueArts Raisen's until I liked the color combinations. Once you settle on how you like them, adhere them together using Raisen's and GlueArts Extreme adhesive squares.


Step 4 • Adhere the flowers to the wreath using adhesive squares. I selected a few flower stickers, added some butterfly stickers and a chipboard 'spring" sticker and then finished off the tops of the flowers with the fun felted wool balls for added dimension.
Step 5 • After you've added the flowers you can personalize the wreath or just leave it as is. Consider adding a banner that says "welcome spring" or an initial for your last name. I added a beautiful ribbon.

How incredibly fun is? And think of all the possible styles, designs and themes you can create with a wreath! Also great teacher gift ideas for their rooms!

Leave us a comment today and let us know how you would use ourGlueArts Raisen's for your next project! We'll enter you to win two pack of our Raisen's along with a pack of our U Cut It Foam! Both products are perfect for adding just a bit of dimension for your crafts and more! We'll pick one random winner next Monday!
Speaking of winners...let's announce last week's winner and that is:


Congrats to you Lisa! Please email me at Gluegirl@gluearts.com with your info! And don't forget.. you can shop online right from the convenience of your home, Ipad, Iphone, Android phone! GlueArts offers safe shopping and best...FREE SHIPPING all month!